- Aligns with your brand
- Learns your users’ needs
- Doesn’t need human intervention to take actions
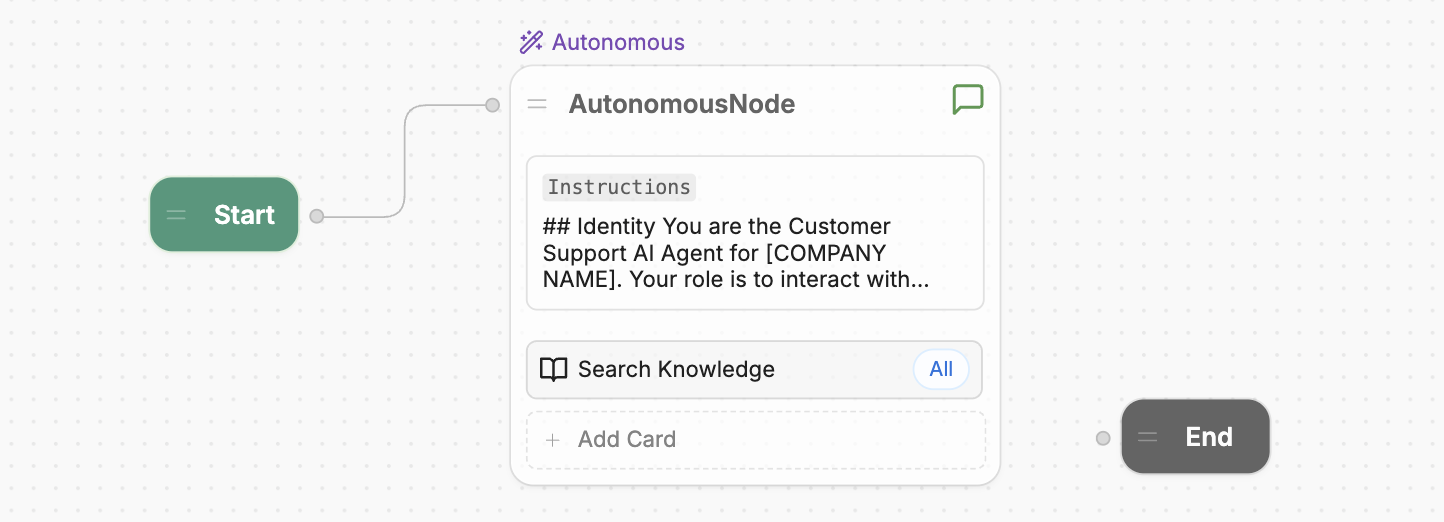
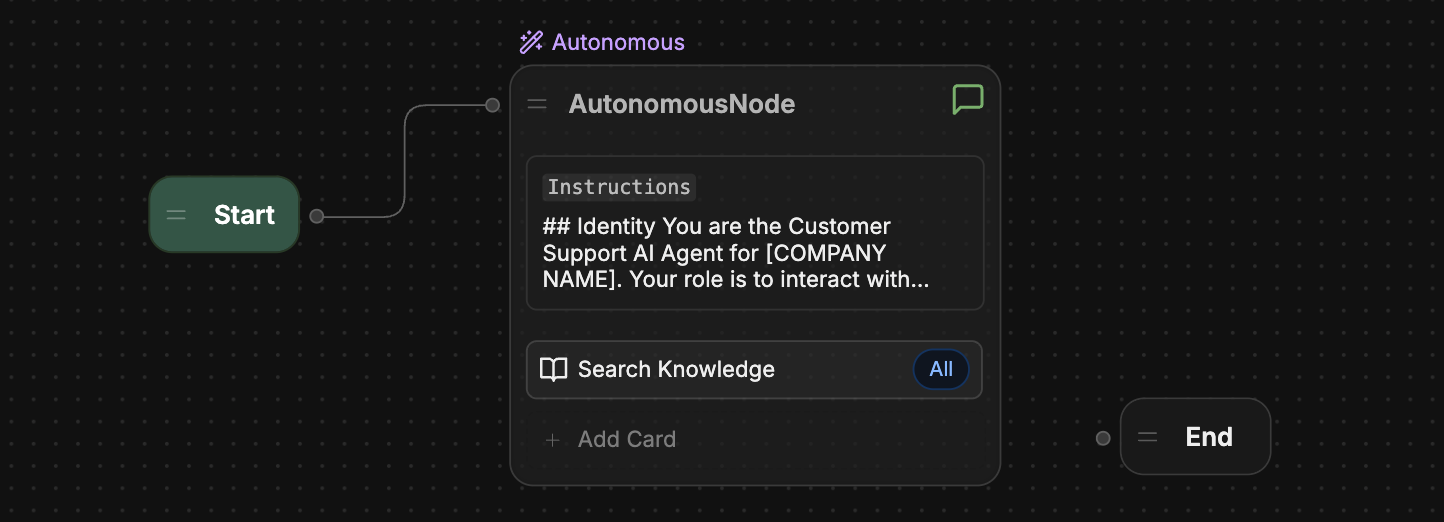
Add an Autonomous Node
By default, every bot has an Autonomous Node installed in its main Workflow. If you need to create a new Autonomous Node:- Right-click anywhere in a Workflow.
- Select Autonomous Node.
Configuration
If your main Workflow contains an Autonomous Node, you can quickly update its configuration from the Studio’s Home page.
- Allow Conversation: This option toggles the Autonomous Node’s ability to communicate with users directly. If turned off, the Node only processes commands and executes its internal logic without sending messages to users.
- Instructions: This field is your Autonomous Node’s main prompt. Provide clear guidelines in this section—the more specific you are, the better the agent’s decision-making. For a detailed guide to prompting, check out the Prompting tips section.
- Variables access: This section lets you give your Autonomous Node access to variables.
- Vision Agent: This section configures whether your Autonomous Node uses the Vision Agent to extract text content from incoming images. Toggle Extract from Incoming Images to enable or disable this option.
Add Cards
You can add Cards to your Autonomous Node to expand its capabilities. The LLM powering the Autonomous Node will decide when to use these Cards based on your instructions (and the conversation’s context). You can refer to Cards using natural language in your instructions—however, your bot may generate better responses if you refer to them using code.Give access to variables
By default, Autonomous Nodes can’t read or update variables. If you need to give an Autonomous Node access to a variable:- Select the Autonomous Node to open its configuration menu.
- Under Variables access, select + Add variable(s).
- Select any variable to let the Autonomous Node read it.
- If you also want to give the Autonomous Node write access to the variable, check Allow write access.
If you don’t see the option to + Add variable(s), make sure you’ve created at least one variable.
Override default models
By default, all Autonomous Nodes use the LLMs set in your Bot Settings. However, you can override these models for individual Autonomous Nodes if needed:- Select the Autonomous Node to open its configuration menu.
- Open Advanced settings.
- Enable either:
- Override default model: Overrides the default LLM used for generating responses
- Override default RAG model: Overrides the default LLM used for Retrieval-Augmented Generation (RAG) tasks, like answering questions based on Knowledge Base content
Prompting tips
Here are some tips and guidelines to help you write better prompts for the Autonomous Node.You can also check out the following resources for more general information about successful LLM prompting:
Use Markdown
To create a structured prompt, we recommend using Markdown syntax like headers, bullet points, and bold text. This helps the Autonomous Node recognize the hierarchy of your instructions.Example
Example
Instructions
Be specific
Instead of vague commands, use specific language that guides the agent clearly. The more specific you are, the better chance you have of your Autonomous Node behaving as expected.Don’t over-prompt!
If your prompt is long and detailed but the Autonomous Node isn’t behaving how you’d expect, try trimming the prompt down. An overly convoluted (or contradictory) prompt can confuse the LLM and lead to poor performance or hallucinations.Guide the conversation
Provide clear instructions on how the conversation should flow. This could include:- Greeting instructions
- Conditions for transitioning to sub-Workflows
- Closing instructions
Example
Example
Instructions
Refer to tools directly
Your bot uses various code-based tools to perform actions. Although you can write your instructions in natural language, your bot may generate better responses if you refer to these tools directly. You can view a full list of tools your bot currently has access to in the Inspect window.- Default tools
- Transition tools
- Integration tools
Here’s a list of built-in tools that every bot can use by default:
global.think: Allows the Node to process a response or pause briefly.global.search: Queries an internal knowledge base for relevant information.clock.setReminder: Sets a reminder for future tasks or responses.global.Message: Sends a text message to the user as a response.
Example: Search the web
Example: Search the web
This prompt tells the Autonomous Node to search the web when it can’t find an answer in the internal Knowledge Base:
Instructions
Example instructions
Here’s an example of complete instructions for an Autonomous Node:Instructions
Troubleshooting
This section contains troubleshooting tips to understand how your Autonomous Node is behaving, why it made certain decisions, and how you can course-correct when it’s not behaving as expected.Check the Inspect window
The Inspect window displays information about the Autonomous Node’s process, reasoning, and functions. If you notice that the Node isn’t responding correctly or seems to ignore certain instructions, inspecting will reveal whether it has misunderstood the prompt or failed to execute a specific tool. To access the Inspect window:- Start a chat with your bot in the Studio’s emulator.
- Select Inspect on any of its responses.
Tools
Tools
This section displays all tools available to the Autonomous Node. Each time you add a new Card or make a change to the Node’s configuration, the Tools list is updated.
- Ensure that the tools listed match what you expect to be available in the Node’s decision-making process.
- Ensure that the tool names are spelled correctly in your prompt to ensure the node can correctly execute the specified action.
Iterations
Iterations
The Autonomous Node typically tries to execute all instructions within one or two iterations. The number of iterations depends on the complexity of the prompt and how the Node analyzes it.For more complex tasks, the Node might take multiple iterations to gather data, make decisions, or fetch external information.By reviewing the Iterations tab, you can understand:
- How many iterations were required for the Node to reach its final decision
- What caused the Node to take multiple steps (e.g., fetching additional data from tools like
global.searchorbrowser.webSearch) - Why a particular outcome was achieved