With embedded Webchat
If you added Webchat to your website using the embed code, follow the steps below to send custom events:You will need:
- A website with an embedded bot
- Familiarity with JavaScript
1
Send an event to Webchat
First, set up an event to send Webchat from your website’s source code. Use the You can replace the data in
window.botpress.sendEvent method:index.js
customPayload with anything you like.2
Add a Custom Trigger
Next, add a Custom Trigger to your bot’s Workflow: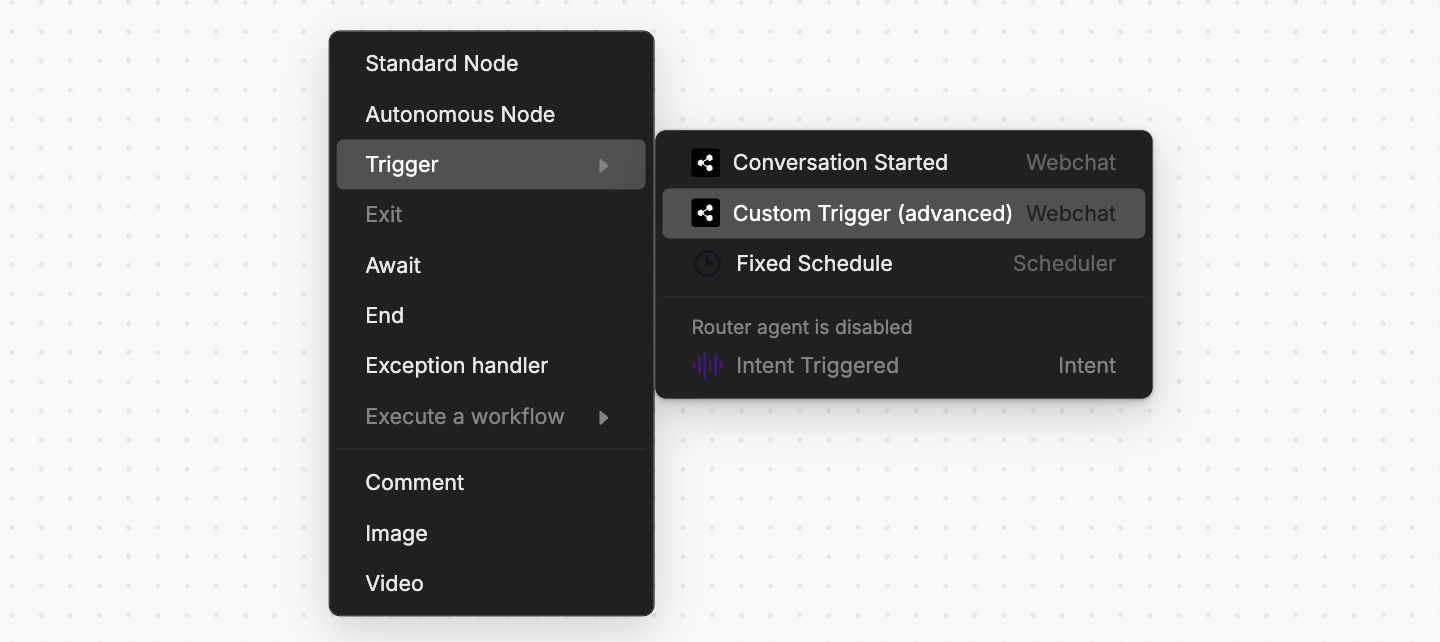
- In your Workflow, right-click and select Trigger, then Custom Trigger:
- In the Event Filter field, enter
{{event.payload}}. This will capture the most recent event you send. - Select Test, then Show last received events. This will display any events you’ve sent from your website.
- If you’ve already sent your event, it should show up here. Select Add as Test, then Save.
3
Test your trigger
Now you can test your Custom Trigger: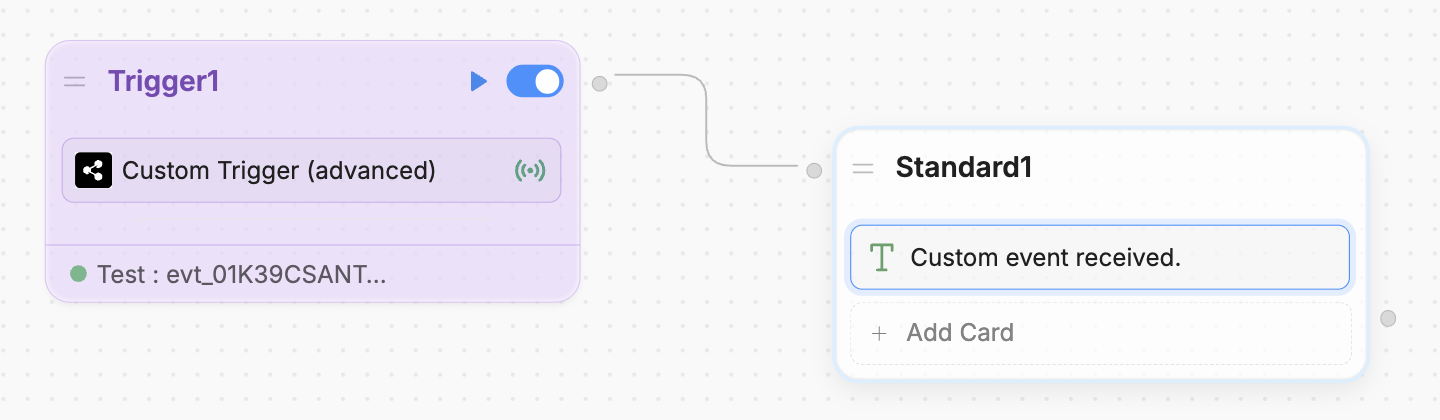
- Add a transition from the Custom Trigger to another Node. For example:
- Select the button to test the Custom Trigger’s behaviour in the Studio’s Emulator.
Once you’ve re-published your bot, it’ll respond to custom events.
With the Webchat React library
If you’re using the Webchat React library, follow the steps below to send custom events:You will need:
- A working React app that implements Webchat
1
Add the useWebchat hook
At the top level of your React component that renders Webchat, add the Remember to replace the placeholder
useWebchat hook and destructure the client object:clientId with your bot’s actual client ID.2
Send an event to Webchat
Now, use the Then, send the event using
client instance to send an event to Webchat. First, define a payload object with any data you’d like. For example:client.sendEvent(customPayload). For example, in a button:3
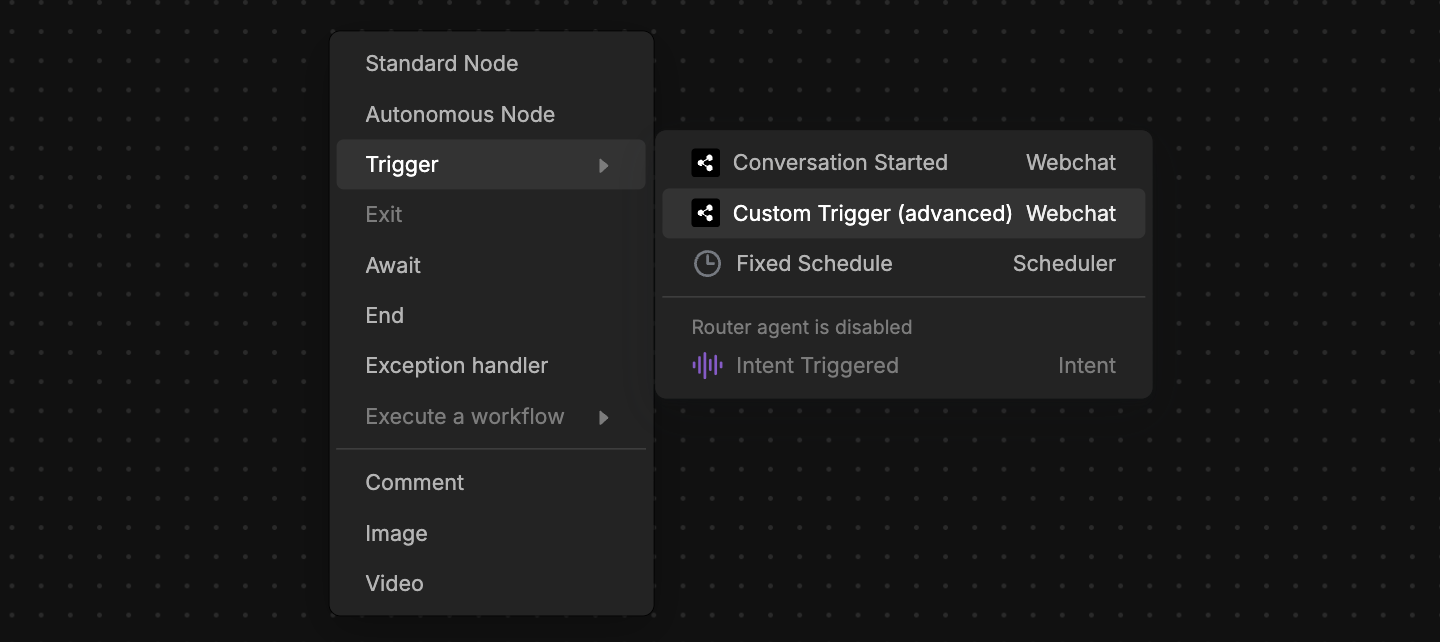
Add a Custom Trigger
Next, add a Custom Trigger to your bot’s Workflow:
- In your Workflow, right-click and select Trigger, then Custom Trigger:
- In the Event Filter field, enter
{{event.payload}}. This will capture the most recent event you send. - Select Test, then Show last received events. This will display any events you’ve sent from your website.
- If you’ve already sent your event, it should show up here. Select Add as Test, then Save.
4
Test your Custom Trigger
Now you can test your Custom Trigger:
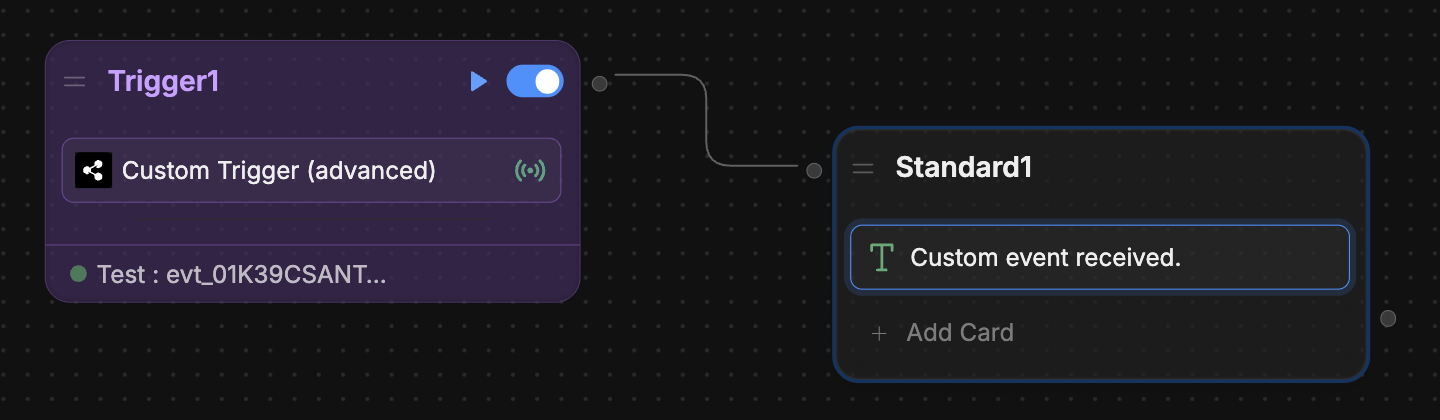
- Add a transition from the Custom Trigger to another Node. For example:
- Select the button to test the Custom Trigger’s behaviour in the Studio’s Emulator.
Once you’ve re-published your bot, it’ll respond to custom events.